Gábor Herédi-Szabó
Head of Single Board Computing category at Distrelec
Captivated by the wealth of applications and opportunities that arise with single board computing (SBC) technology, Gabor is passionate about connecting people of all skill-sets with the SBC products that will propel and expand their unique projects.
How to pick the right board: an Arduino comparison guide
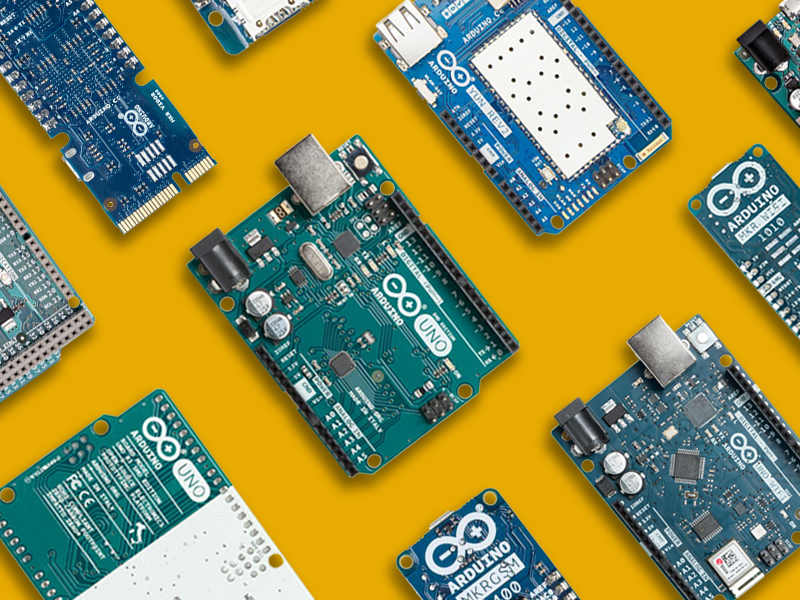
When it comes to choosing the right Arduino board for your project, the wide selection of boards can be intimidating. In this guide, we’ll give you all the basic info you need to decide which board will work with your requirements and make your ideas a reality. Ranging from a spec overview to a closer look at each board’s strengths, look no further than this guide when picking your next Arduino board. We have selected some of the most popular Arduino boards that are still in production. While this is not a comprehensive overview of all Arduino boards ever produced, it does include a suitable board for any application.
Spec overview
If you’re already quite knowledgeable about Arduino and only need a quick refresher on all the different boards’ specs, look no further than our short overview below. Read on for further details on each board.
| Name | Processor | Operating/Input voltage | CPU speed | Analog In/Out | Digital IO/PWM | EEPROM [kB] | SRAM [kB] | Flash [kB] | USB | UART |
|---|---|---|---|---|---|---|---|---|---|---|
| Uno | ATmega328P | 5 V/ 7-12 V | 16MHz | `6/0 | 14/6 | 1 | 2 | 32 | Regular | 1 |
| Nano | ATmega168 ATmega328P | 5 V / 7-9 V | 16MHz | 8/0 | 14/6 | 0.5121 | 12 | 16 32 | Mini | 1 |
| Leonardo | ATmega32U4 | 5 V / 7-12 V | 16MHz | 12/0 | 20/7 | 1 | 2.5 | 32 | Micro | 1 |
| Micro | ATmega32U4 | 5 V / 7-12 V | 16MHz | 12/0 | 20/7 | 1 | 2.5 | 32 | Micro | 1 |
| Esplora | ATmega32U4 | 5 V / 7-12 V | 16MHz | – | – | 1 | 2.5 | 32 | Micro | – |
| Due | ATSAM3X8E | 3.3 V / 7-12 V | 84MHz | 12/2 | 54/12 | – | 96 | 512 | 2 Micro | 4 |
| Mega2560 | ATmega2560 | 5 V / 7-12 V | 16MHz | 16/0 | 54/15 | 4 | 8 | 256 | Regular | 4 |
| Zero | ATSAMD21G18 | 3.3 V / 7-12 V | 48MHz | 6/1 | 14/10 | – | 32 | 256 | 2 Micro | 2 |
| MKR1000 | SAMD21 Cortex-M0+ | 3.3 V / 5 V | 48MHz | 7/1 | 8/4 | – | 32 | 256 | Micro | 1 |
| MKRZero | SAMD21 Cortex-M0+ 32bit low power ARM MCU | 3.3 V | 48MHz | 7 (ADC8/10/12 bit) /1(DAC10bit) | 22/12 | No | 32KB | 256KB | 1 | 1 |
| Yùn | ATmega32U4 AR9331 Linux | 5 V | 16 MHz 400 MHZ | 12/0 | 20/7 | 01 | 2.5 16 MB | 64 MB | Micro | 1 |
| LilyPad | ATmega168V ATmega328P | 2.7-5.5 V / 2.7-5.5 V | 8 MHz | 6/0 | 14/6 | 0.512 | 1 | 16 | – | – |
Uno

The Uno is the perfect board for beginners – as the most basic Arduino of the bunch, it provides all the functionality you need to realise simple projects. It is the most used and documented board of the whole Arduino range, so there is plenty of support available if you are just starting out. It is a microcontroller board based on the ATmega328. It has 14 digital input/output pins (of which 6 can be used as PWM outputs), 6 analogue inputs, a 16 MHz crystal oscillator, a USB connection, a power jack, an ICSP header, and a reset button. It contains everything needed to support the microcontroller; simply connect it to a computer with a USB cable or power it with an AC-to-DC adapter or battery to get started.
Nano

Similar to the Uno, the Nano is a basic Arduino board. However, this time it comes in a compact package. It doesn’t have a DC power jack and works with a Mini-B USB cable instead of the standard USB. This breadboard-friendly development board is the ideal choice for most applications where the size of electronic components plays an important role. It features 8 analogue inputs as well as a 16 MHz ceramic resonator, but other than that does not differ much from the Uno.
Leonardo

The Leonardo is a variation on the Uno board. Providing much of the same functionality, it goes one step further in that the ATmega32u4 has built-in USB communication, eliminating the need for a secondary processor. This allows the Leonardo to appear to a connected computer as a mouse and keyboard, in addition to a virtual (CDC) serial / COM port. It also has other implications for the behaviour of the board. For instance, the Leonardo uses a single microcontroller to both run sketches and for USB communication with the computer, which allows for more flexibility in its communication with the computer. It also helps to lower the cost of the board by removing the need for an additional processor.
Micro

Just like the Leonardo board, the Arduino Micro is also recognisable to a connected computer as a mouse and keyboard. However, it comes in a much smaller package. It’s the smallest board of the family, making it easy to integrate into everyday objects to make them interactive. Comparable to the step from Uno to Nano, a smaller board can be useful for applications where space is limited.
Esplora

The Esplora is also based on the Leonardo board. It differs from all preceding Arduino boards in that it provides a number of built-in, ready-to-use set of onboard sensors for interaction. It’s designed for people who want to get up and running with Arduino without having to learn about the electronics first.
It has onboard sound and light outputs as well as several input sensors, including a joystick, a slider, a temperature sensor, an accelerometer, a microphone, and a light sensor. It also has the potential to expand its capabilities with two Tinkerkit input and output connectors, and a socket for a colour TFT LCD screen.
Due

The Due is a step up from basic boards like the Uno, Nano, Leonardo, Micro and Esplora. It is the first Arduino board based on a 32-bit ARM core microcontroller and is the perfect board for powerful larger scale Arduino projects. It has 54 digital input/output pins (of which 12 can be used as PWM outputs), 12 analogue inputs, 4 UARTs (hardware serial ports), a 84 MHz clock, an USB OTG capable connection, 2 DAC (digital to analogue), 2 TWI, a power jack, an SPI header, a JTAG header, a reset button and an erase button.
Mega 2560

The MEGA 2560 is also designed for more complex projects. With 54 digital I/O pins and 16 analogue inputs (just like the Due), as well as a larger space for your sketch it is the recommended board for 3D printers and robotics projects. This gives your projects plenty of room and opportunities. It is an update to the original Mega board that is now retired, featuring general improvements.
Zero

The Zero is a simple and powerful 32-bit extension of the platform established by the Uno. The Zero board expands the family by providing increased performance, enabling a variety of project opportunities for devices, and acts as a great educational tool for learning about 32-bit application development. The Zero applications span from smart IoT devices, wearable technology, high-tech automation, to robotics.
MKR

he Arduino MKR family of boards features various different kinds of boards that are all united in their ideal application purpose: prototyping IoT projects. They feature integrated connectivity (with the exception of the MKR Zero – the smallest board in the MKR family) ranging from WiFi to GSM, Narrowband IoT, Lo-Ra connectivity and SigFox networking in their 67.64 × 25mm package and are suited for projects of varying levels.
Yùn

The Yún distinguishes itself from other Arduino boards by its ability to communicate with the Linux distribution onboard, offering a powerful networked computer with the ease of an Arduino. In addition to Linux commands like the cURL, you can write your own shell and python scripts for robust interactions. The Yún is similar to the Leonardo with the ATmega32u4 in that is has built-in USB communication, eliminating the need for a secondary processor, except that it has Linux on board.
LilyPad

The LilyPad is an innovative Arduino board that is designed to be sewn into wearable technology with conductive thread. With the ability to streamline your next sewable project by keeping things simple and giving you more room to work while eliminating the need to sew a power supply, it works just like a regular Arduino – except sewn into your e-textile project. It’s even washable!
Armed with this knowledge, you can make an informed choice on which board best suits your application needs. And if you’re interested in Arduino, we have even more resources to get you started:


