Heat shrink tubing is widely used in many applications. It is excellent for wire bundling, colour-coding, electrical insulation and strain relief. Additionally, it offers your wires protection against abrasion, chemicals, and the environment.
If you understand the right techniques, insulating your cables with heat shrink can be a simple task. Even simpler with our guide and RND brand that has all your heat shrink and end caps needs covered. Have a look below to find out more.
What is heat shrink tubing?
Heat shrink tubing, sometimes referred to as heat shrink or heat shrink sleeving, is a polymer shrinkable sleeve which conforms to the size and shape of the substrate beneath when exposed to heat. Heat shrink is made utilising a two-step method and is accessible in a wide range of materials to suit practically every purpose. It may be used to bundle loose objects like cables (read more about cable management here) and as a protective covering in addition to providing electrical insulation for wires, connectors, joints, terminals, and splices.
Heat shrink tubing can be utilised as identification (colour-coding) for cabling as well as protection from cutting, abrasion, scuffing, and low impact circumstances. It gives the wires and connectors an additional layer of sturdiness. Heat shrink enables the usage of components in environments where they might be subjected to chemicals, moisture, and dust. It is a good alternative for taping, moulding, or potting.
The main features of heat shrink tubing
- Covering joints and repairs
- Preventing dust and moisture from entering cable splices
- Protecting cables against corrosive substances
- Preventing chemical and UV abrasion, moisture and dust damage
- Creating durable labels for network patch cables
- Insulating cables and wires in cars against intense heat
- Enabling colour coding and component ID for quick identification
- Giving cables a neat look and better connection (relieves pressure from the cable)
- Tidying up the end of braided sleeving
RND bear in mind your needs and offers heat shrink tubing products that are versatile and practical and can be applied to wires and cables to strengthen, insulate, protect, and identify them.
Materials and types of heat shrinkable products
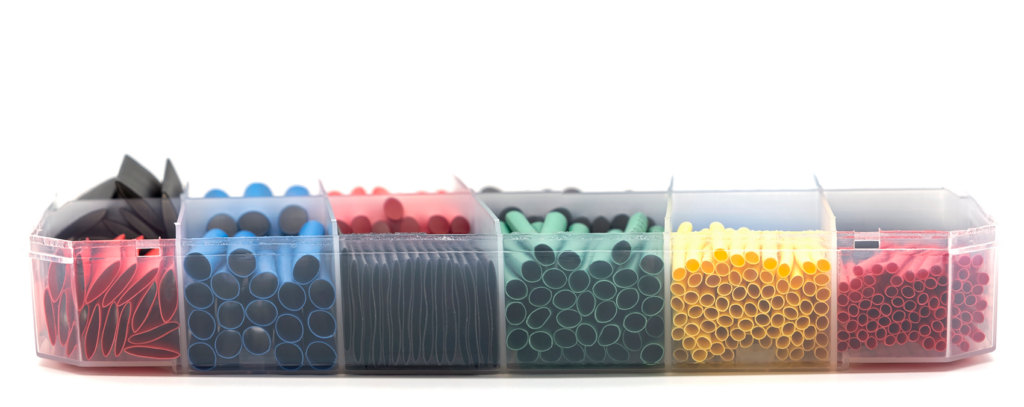
To meet the needs of each application, heat shrink is offered in a variety of materials, colours, sizes, and shrink ratios. Some of them include an adhesive coating that aids in securing the tubing to the wires and parts.
The most widely used material for shrink tubing is polyolefin because of its temperature resilience. While costing more than PVC, it can endure temperatures of 125–135°C. Furthermore, PVC, fluoropolymer, neoprene, and elastomeric materials are used in their production. To aid the tubing shrink back to its original size, the material is frequently cross-linked.
Heat shrink ratio
It is crucial to consider the ratio when choosing a sleeve or tube. This information can be found in the product specification and indicates how big the original tubing was in comparison to its final shape after being shrunk. The most common ratios are 2:1, 3:1 and 4:1. The shrinking size is different for each of the ratio values. For example, when heat is applied to heat shrink tubing with 2:1, it will shrink to half of its initial size. As a result, the original heat shrinkable tubing is twice as big as its shrunken form.
Depending on the purpose, you might need a higher or lower shrink ratio. For instance, 3:1 dual wall tubing is utilised to close off unusual forms, and the adhesive adheres to a variety of materials, whereas 4:1 tubing is used to cover large substrates, such as automotive wire splices, seal in the environment, and withstand harsh conditions. In order to ensure adequate coverage, it is generally advised that the ratio between the supplied inner diameter of the heat shrink tubing and the size of the object to be protected not exceed 40%.
There are also ranges as low as 1,5:1 and as high as 6:1, and the highest ratio is perfect for making waterproof seals for substantial cable bundles.
What are heat shrink end caps?
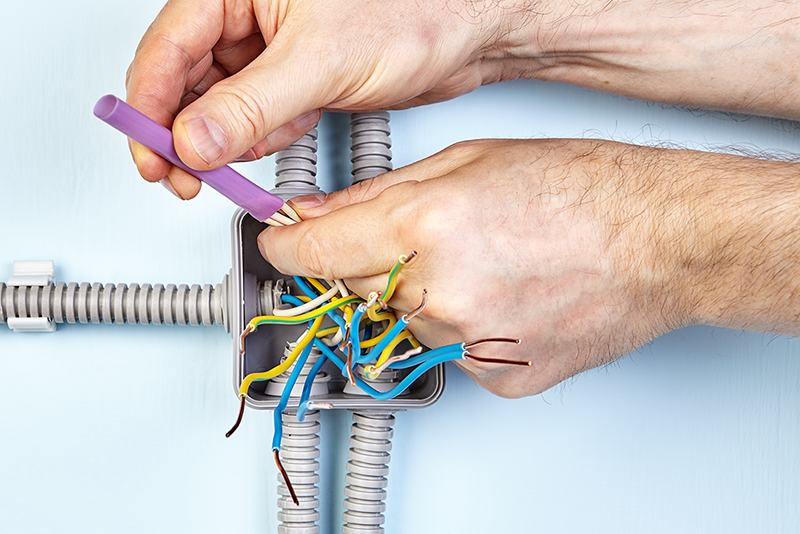
Heat shrink end caps are used mainly with heat shrink tubing so we recommend purchasing them together. Each cap has outstanding resistive abilities; they are flexible and water-resistant which help to protect and insulate the ends of exposed cables and wires.
The cap reliably seals cable ends and offers dependable defence against corrosion, abrasion, and chemicals, making them perfect for extensive cable environmental protection. The heat shrink end caps are also used to seal high voltage cables and let out expanded gases that build up inside the cables as a result of storage, transit, and environmental factors.
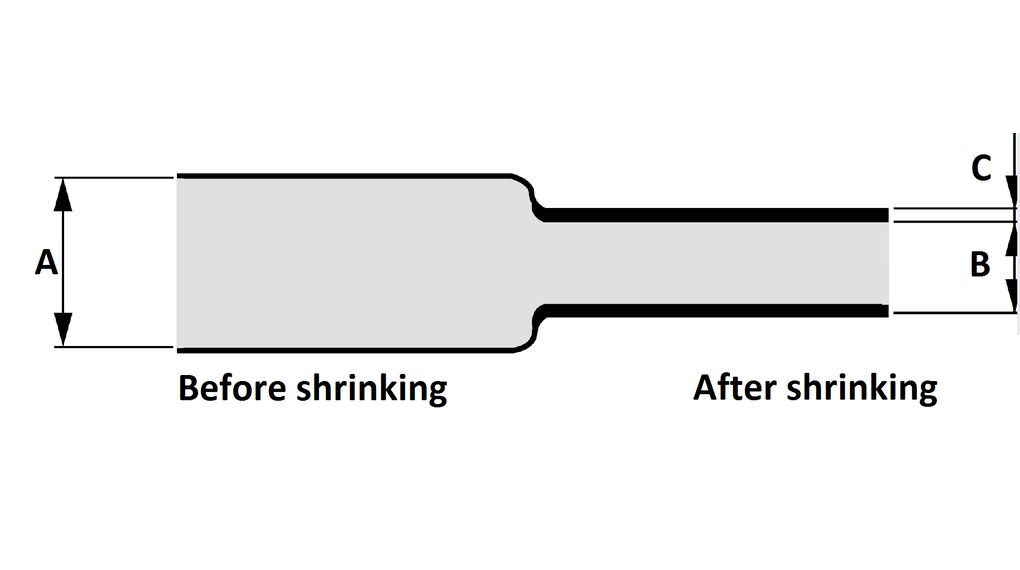
Heat shrink caps come in a variety of diameters so you need to make sure they will fit the cable end properly. Have a look below at some of the RND examples.
| As supplied/mm | As supplied/mm | As supplied/mm | After recovered/mm | After recovered/mm | |
| Art. Nr. | Inner diameter | Wall thickness | Height | Inner diameter | Wall thickness |
| RND 465-01002 | ≥16 | 1.1±0.3 | 70±5 | ≤8.5 | 2.5±0.5 |
| RND 465-01003 | ≥25 | 1.1±0.3 | 84±5 | ≤11 | 2.5±0.5 |
| RND 465-01004 | ≥30 | 1.1±0.3 | 94±5 | ≤16 | 3.0±0.5 |
| RND 465-01005 | ≥55 | 1.1±0.3 | 125±5 | ≤26 | 2.5±0.5 |
| RND 465-01006 | ≥74 | 1.1±0.3 | 145±5 | ≤31 | 3.0±0.5 |
| RND 465-01007 | ≥97 | 1.1±0.3 | 140±5 | ≤40 | 5.0±0.5 |
The RND end caps are made of cross-linked polyolefin, all in black colour. They can be used on de-energized power lines as a waterproof sealing, electrical insulation, and mechanical protection cover. To ensure a secure seal of the cable ends, they are coated with hot-melt adhesive.
How to install heat shrink tubing
Since you know a little bit about heat shrink tubing and end caps, it is time to come to action.
The most important aspect is understanding your application and the parameters. This can guarantee that you will purchase the appropriate product. Above all, determining the proper size is the most crucial decision, whether you’re utilising heat shrink tubing for an electrical application, a strain relief, a protective covering, or any other purpose.
SAFETY PRECAUTIONS
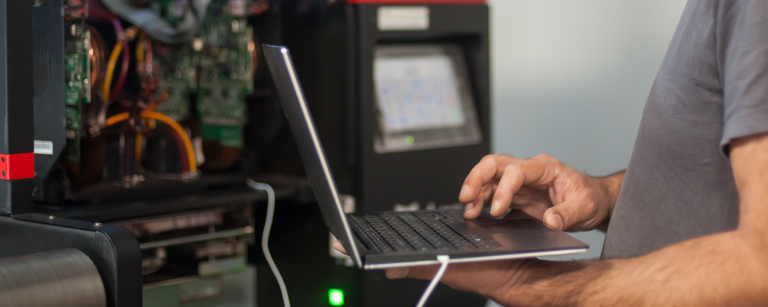
In addition to the actual heat shrink, and understanding its size, you’ll also require a heat gun or a heat shrink oven. Despite the fact that using heat shrink tubing might be quite easy, you always should put safety first.
Using gloves, eye protection, masks to prevent fume inhalation, tying back long hair, and not wearing inappropriate clothing that might get in the way of the heating element are all wise precautions when working with a heating source. Ensure that the area is well ventilated while using a heat gun indoors, even when you are wearing a mask. On top of that, make sure there are no dangerous products, and never point the heat gun directly at yourself. Even though it can seem like basic knowledge, putting it into practice is crucial. To find out more about the health and safety workwear, read this article.
STEP 1: Choose the right size
Consider the largest and smallest diameter of the area you are covering while choosing the appropriate size tubing. To ensure a tight fit, make sure the recovered diameter (the diameter after shrinking) is smaller than the diameter of the area you’re going to insulate. You’ll get a snug fit as a result when it shrinks. The expanded diameter (the pre-shrinkage diameter) of the tubing must also be sufficient to cover the area that has to be insulated without difficulty, as well as any connectors connected to it.
STEP 2: Cut to adjust
The next step is to cut the heat shrink tubing to a useful length once you’ve established that you have the correct dimensions for your heat shrink. Keep in mind that tubing also contracts lengthwise during the shrinking process, often by 5-7%. With regular scissors, most heat shrink may be readily cut.
STEP 3: Position
Now that everything has been measured and cut, it’s time to cover the object with the cut tubing. Slide the tube across the middle of the splice if you’re joining two wires. As a result, there will be an equal amount of overlap on both sides, completely covering the splice.
STEP 4: Ensure the right specifications
Check the tubing’s specifications for the required heating temperature prior to shrinking. The tube may be shrunk using any heat gun or heat shrink oven. It is not advised to use an open flame in place of a heat gun or heat shrink oven because uncontrolled heat can lead to uneven shrinking, physical damage, and insulation failure.
STEP 5: Apply heat

If you’re using tubing to cover a long piece of cable, start shrinking at one end and work your way down to the other. Rotate the object as you apply heat to ensure that the tubing shrinks uniformly and without air bubbles.
Heat the tube consistently along its length and around its diameter until it shrinks. Make sure it fits the cable, hose, splice, or other object it is protecting. Remove the heat source immediately and let the tube cool gradually before putting physical pressure on it.
Be careful not to overheat! Also, for guidance of heat shrink over cables or cords without damaging the heat shrink material, use a silicone lubrication spray.
STEP 6: Let it cool down
Do not forget that the freshly heated tubing needs to cool for roughly five minutes before being pressed against the connected wires.